The micrometer and the caliper are often seen as rivals for the same tasks, but in reality you should see them as best friends who are good at slightly different things and who complement each other.
The difference between them is that the micrometer has a shorter measuring range but is more accurate than the caliper.
The very first micrometer reminiscent of today's mechanical micrometers was created as early as 1848 by a Frenchman named Jean Laurent Palmer.
It is easy to believe that the micrometer got its name because it can measure measurements as small as one µm but this was not the case for a long time.
A mechanical micrometer has – then as now – a typical resolution of 0.01 mm (10 µm).
The word micrometer has been around for hundreds of years and is simply a designation because it is an instrument that can measure small measurements.
It was really only when digital micrometers reached the market a few decades ago that it became common with a resolution of one µm. There are also micrometers with a resolution of 0.1 µm! That is 100 times better resolution than a standard mechanical micrometer.
Like so many other measuring instruments, the micrometer is also available in a variety of variants and designs. Measuring ranges, measuring surfaces, data outputs, resolution, accuracy, surface hardness, water resistance, etc., there are lots of different parameters to consider when choosing the right instrument. There are also a number of different closely related instruments such as the 3-point micrometer for internal diameter measurements.
Personally, I would like to recommend Mitutoyo's Quickmike series, which has a slightly longer measuring range (30 mm) but above all a quick setting that means that you do not have to screw as many turns to get to the right dimensions. A standard micrometer moves 0.5 mm per revolution while a Quickmike moves 10 mm per revolution with good precision! It is fast and accurate and fits perfectly with almost all measurement data.
What about calibration then? Yes, the micrometer is no exception, it must be calibrated!
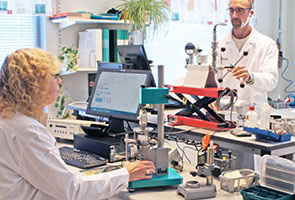
Elastocon performs accredited calibrations of micrometers up to 500 mm. We also perform traceable calibrations on micrometers over 500 mm.
During a calibration, we do many more checks and measurements than just measuring if it shows correctly. For example, we measure the flatness and parallelism of the measuring surfaces. The fact that the measuring surfaces are both flat and parallel is something you may not think of as a user, but surfaces that are not perfect can impair the measurement result quite a lot. Other parameters that we control and that are important for the instrument's measuring accuracy and handling include the inertia of the friction screw and the function of the locking.
A calibration is a cheap insurance to keep track of that you measure correctly and that everything works as it should!
As usual, I end this with a call – give your micrometer some care, keep it clean and nice and give it a calibration sometimes and it will serve you well for a long time!
P.S. If you have any questions or need any help, please send inquiries to This email address is being protected from spambots. You need JavaScript enabled to view it.
Erik Stenström


